
Main Engine & GenSet
Main Engine - Yanmar - 1990 - 77 HP Turbo Diesel
As part of preparing to take delivery of the boat, we brought in a mechanic to do a deep dive on the engine. He found a few items that need to be addressed in order for us to be comfortable with the mechanical state of the engine.
Required maintenance items
The coupling that the engine coolant inlet hose is attached to on the heat exchanger is badly corroded. The concern is that if this fails, we lose the coolant loop on the engine and cause the engine to overheat. In order to remediate it, we will need to replace the entire heat exchanger.
The engine is smoking a bit while running. This is an indication of fuel injector issues. They likely need to be rebuilt.
The hose clamps that hold the shaft seal tight around the shaft are badly corroded and will fail soon. We will replace the seal with a dripless while we have the chance.
The serpentine belt on the engine isn't tight enough and is rubbing on the water pump creating a groove in the hose. It needs to be replaced - TBD with Balmar Alternator plan
There is high output alternator that wasn't installed properly and was left in place. It needs to be removed. We may replace it with our Balmar Alternator from storage
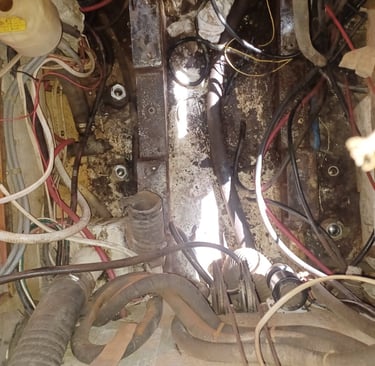
There is quite a bit of rust around the housing and the engine mounts are pretty corroded as well. We need assess their viability.
The Exhaust vent loop pressure relief valve is spewing water while the engine is running and must be replaced.
The propellor shaft has to be replaced due to galvanic corrosion.
The propellor is suspect due to galvanic corrosion and must be sent to a metallurgist to ascertain fit for use.
Inspect Diesel tanks - remediate as required (clean etc) - replace sender system to feed ActiSense NMEA 2000 bridge
Planned upgrades
Replace the oil and coolant senders with senders that will trigger an alarm if limits are reached as well as provide discrete values that can be read by our Actisense analog to digital converter and placed on the NMEA 2000 backbone for use on the Garmin MFDs
Add a raw water flow sensor (AquaAlarm)
Add a exhaust temp sensor (AquaAlarm)
Clean up the engine exterior
Verify complete function of the cockpit engine panel
The starter batteries are still viable, but once we do the lithium upgrade, they can be replaced with SolidState lithium batteries that are capable of being used as crank batteries. They will be switchable to integrate with, or be backed up by the house bank(s).
Add water in fuel sensor to RACORs - from storage - tie into the Master Alarm Panel
Add Fuel Vacuum sensor to RACOR - new purchase - tie into NMEA 2000 Backbone
-----
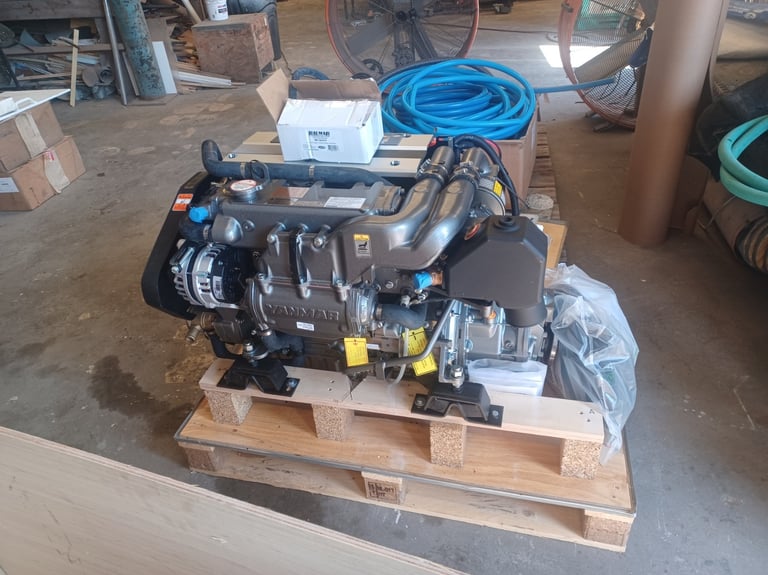
Well that was the plan ---- We did a compression test and cylinder #2 failed. This points us towards a rebuild. We were also able to track down more documentation that led us to believe that this engine has in excess of 8000 hours on it. With limited parts for a 35 year old engine that wasn't made since 1999, we decided to replace the entire engine. So we have a brand new Yanmar 80 HP Turbo Diesel now on order to install.
So now our to-do list looks very different. First of all the engine is already 24 VDC, comes with a high output Alternator (also 24VDC) and has a NMEA 2000 interface for monitoring, so all of the items related to those activities are already taken care of. This leaves:
New dripless shaft seal while we have the chance.
Replace the corroded engine mounts before reinstallation.
The Exhaust vent loop pressure relief valve is spewing water while the engine is running and must be replaced.
The propellor shaft has to be replaced due to galvanic corrosion.
The propellor is suspect due to galvanic corrosion and must be sent to a metallurgist to ascertain fit for use.
Inspect Diesel tanks - remediate as required (clean etc) - replace sender system to feed AlbaCombi NMEA 2000 bridge - more on this on the plumbing page
Add a raw water flow sensor (AquaAlarm)
Add a exhaust temp sensor (AquaAlarm)
Clean up the engine room to include additional layer of sound proofing
Add water in fuel sensor to RACORs - from storage - tie into the Master Alarm Panel
Add Fuel Vacuum sensor to RACOR - new purchase - tie into NMEA 2000 Backbone
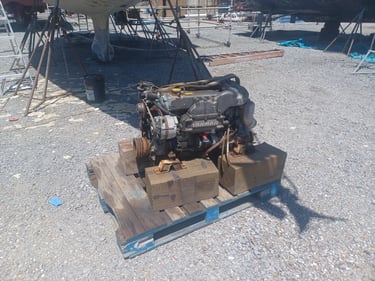
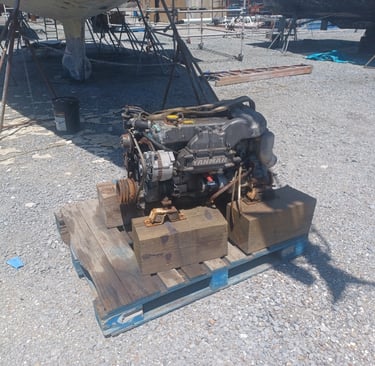
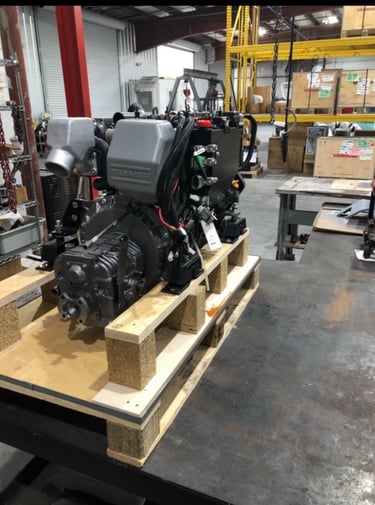

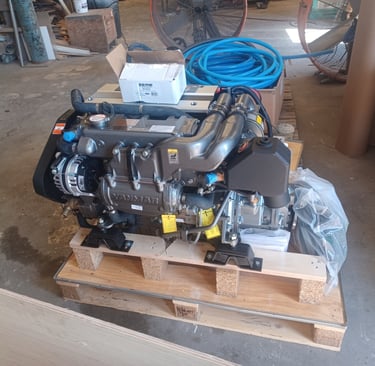
Old Engine is sitting on the old pallet, the new engine sitting on the new pallet.
Engine bay after initial cleaning on the left, It's a bit cleaner on the right. It's going to get sanded and painted and then all new hoses run/ routed to make accessibility and maintainability easier going forward. Also removed the shelf above and aft to make more room on the aft bulkhead to mount stuff (new strainer, electrical terminal DIN Rail, etc)
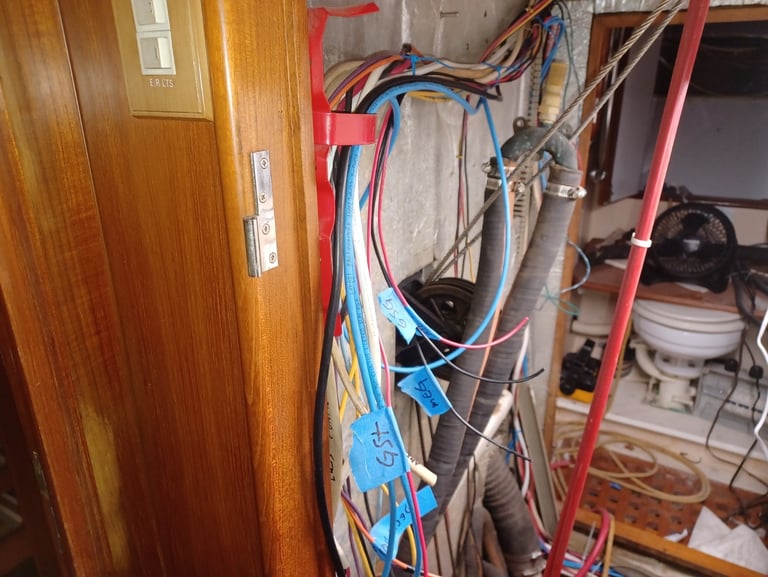
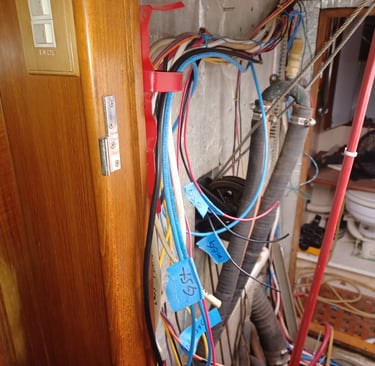
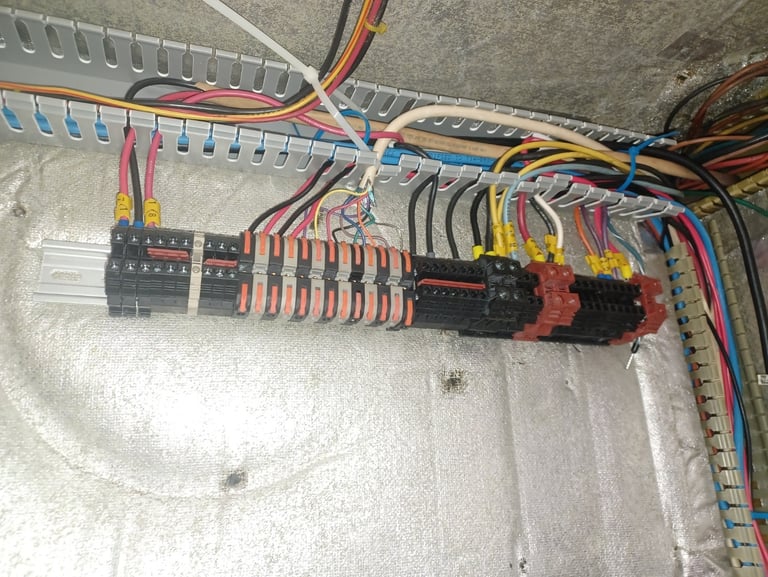
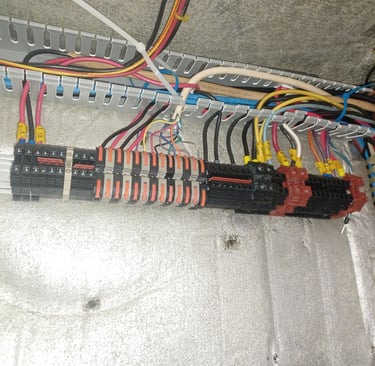
The image on the left is all of the new wiring run to support the helm switch panel, and the new devices on the Solar Arch and the Cockpit enclosure. Image on the right is the DIN rail that holds all of the connections for these wires. We will attach the helm harness to this to go up into the Helm pedestal. The lever connectors support all of the alarm circuits that run through here.
Nov 2025
Lots to report on.
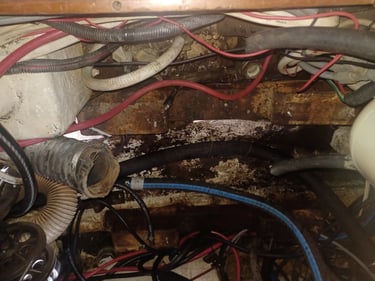
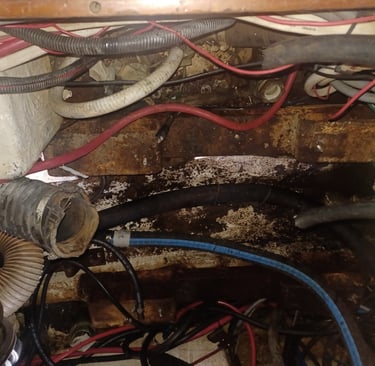
Thru Hulls. After a lot of discussion and analysis, we have decided to markedly redesign how sea water comes into the boat. Originally, there were 7 Thru Hulls in the general vicinity of the engine bay. 2 for raw water intake for the Engine and GenSet, a sink foot pump input, the toilet input, the shower drain, 2 deck drains and the raw water input for the air conditioners. We have decided that we can simplify that considerably and we will now only have 1 for the engine/ Genset, no foot pump for the galley, the shower will drain out through the head sink drain and the galley sink will also get its own thru hull. The deck drains remain unchanged and we are moving the toilet input to a new location which will also feed the sea water washdown on the stern. Since we are also replacing the thru hulls with composite ones made by Forespar and a different style, the old holes weren't going to work. They all got filled. This lead to another issue with the boat yard, when the worker charged with filling them, short-cutted the process and plugged them with Coosa board plugs and then fiberglass over the plugs. Two issues arouse. The first was he didn't remove all of the old caulking and chose to just glass over it. The second, which led to me finding the first, was he didn't ground down the inner and outer surface so that when he was done laying up the glass it ended up flush with the hull. So after expecting the engine room "floor" i.e. the inside of the hull to be ground smooth and having him just come in and paint over everything (dirt, loose screws and the fiberglass patches), I put on the bunny suite and went into the engine room and ground down the patches, the rough areas on the inside of the hull etc to properly prepare it for painting. The yard has since replugged all of the bad thru hull plugs and I have now repainted all of the bilge sections I could get to.
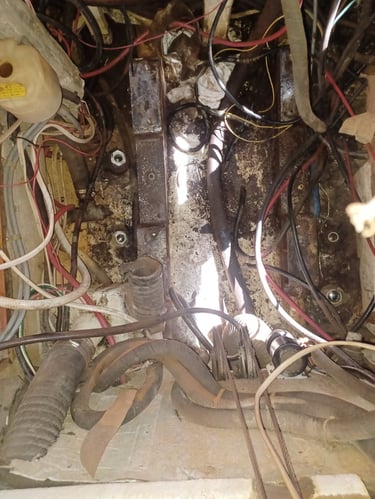
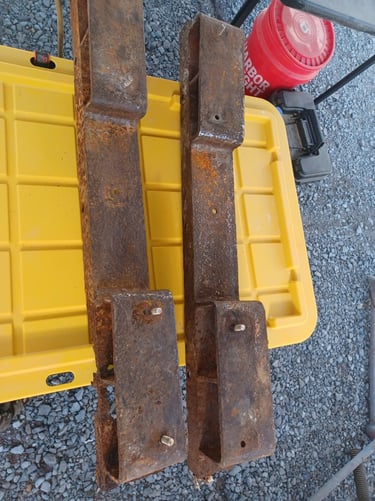
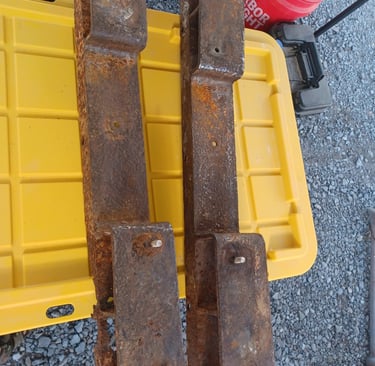
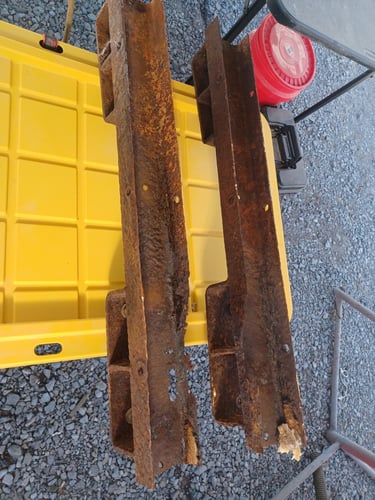
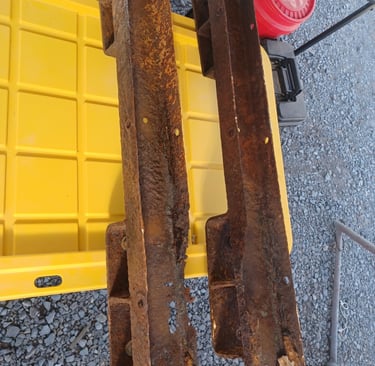
Engine Mounts. I finally decided to take a closer look at the old engine mounts - the one that the original mechanic told me were too difficult to remove - and decided that they were in tough enough shape to try to remove them. 30 minutes later, I had them both out without damaging anything. And yes, they have to be replaced. The images below show them out of the boat with the rust damage clearly visible. It also turns out that the engine mounting studs are in the wrong place for the new motor. The new mount is still being designed, but will likely look similar, but in heavy gage aluminum.
Engine. The engine is now on site. The original picture we were sent, was likely not our motor. We have serious issues with the original mechanic. However, after returning from our summer break, we found the new motor in the mechanic's shop and we confirmed it was ours and promptly removed it and brought it to the yard. Our relationship with the original mechanic has now reached legal action, as we are out about $10K in promised goods that have not been delivered.
Fuel System. We are adding a 3rd fuel pump and replumbing the fuel system to convert a water tank to diesel and incorporate fuel polishing into the mix. We are also adding fuel (and water) tank senders so that we can monitor our tank level from the chart plotters verses the old mechanical pressure gage that was fuel only. The yard's mechanic is going to do that for us as part of the engine install.
Propeller/ Propeller shaft. The shaft has to be remade based on the galvanic corrosion issues. We have also decided to send the prop back to the US Distributor for refurbishment. This was supposed to have been done - another promise the yard failed at - the end of Sep. It finally went out just before Thanksgiving. We are also going to install a Spurs Line cutter on the shaft.
Generator - Westerbeke -
Generator is a Westerbeke 8 KW
It is pretty new with only 50 hours on it. Although the newer models have a NMEA 2000 interface available, ours is a 2009. No such luck. So we will add sensors to bring Oil Pressure and Coolant temp into the AlbiCombi which will then make that data available in the NMEA 2000 environment. We will also add RPM.
We had to add oil to it to run it but it ran just fine and produced power as expected.
Planned upgrades:
Add the same sensors to this engine as we will on the main engine
Check for Alarm circuits - TBD into master alarm panel
Share the Raw Water strainer with the main engine. Will need to put in place procedures to make sure that the right valves are positioned to make sure which motor is being fed with sea water.
The GenSet is also plumbed into the oil change system on the boat.
Finally, we are going to ask the mechanic to give it a quick once over to ensure that since it's been sitting for so long, it doesn't need anything.
